Harnessing Automation: Create Advanced GPT Actions for Your Apps
Written on
Chapter 1: Introduction to GPT Automation
In this guide, we will explore how to enhance your GPT by integrating automation through GPT Actions. These actions enable your GPT to communicate with various applications seamlessly. For instance, we will demonstrate how to automate email sending via Gmail using Zapier Actions, but the same principles can be applied to connect with Google Sheets, Drive, Calendar, and many other apps. Follow the three steps outlined below to get started.
Step 1: Integrate Zapier Action into Your GPT
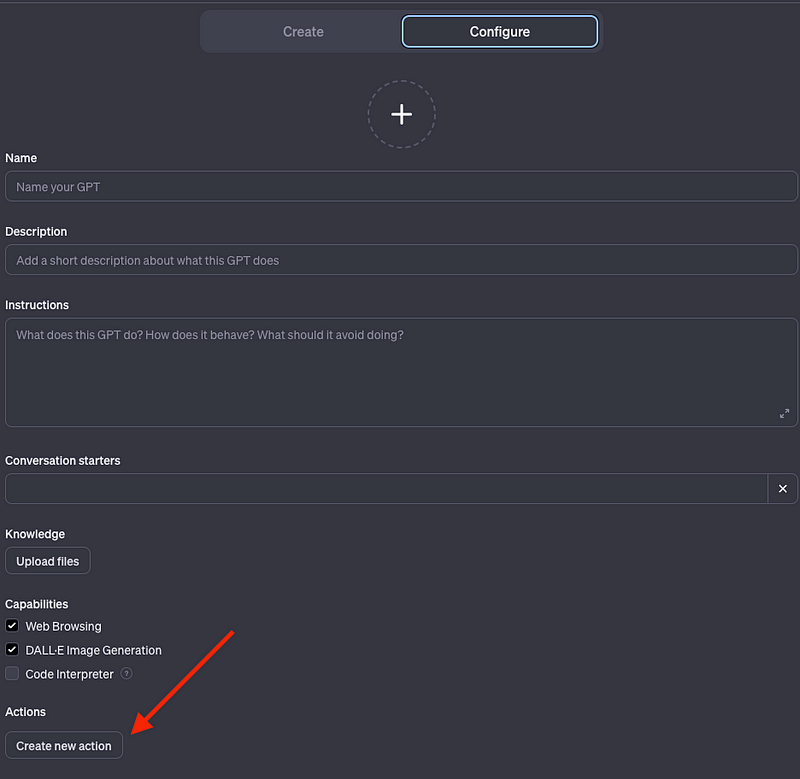
To begin, navigate to the Configure option of your GPT. If you don't currently have a GPT set up, you'll need to create one by following these steps: Open the left sidebar, select “Explore,” and then click on “Create a GPT” within My GPTs.

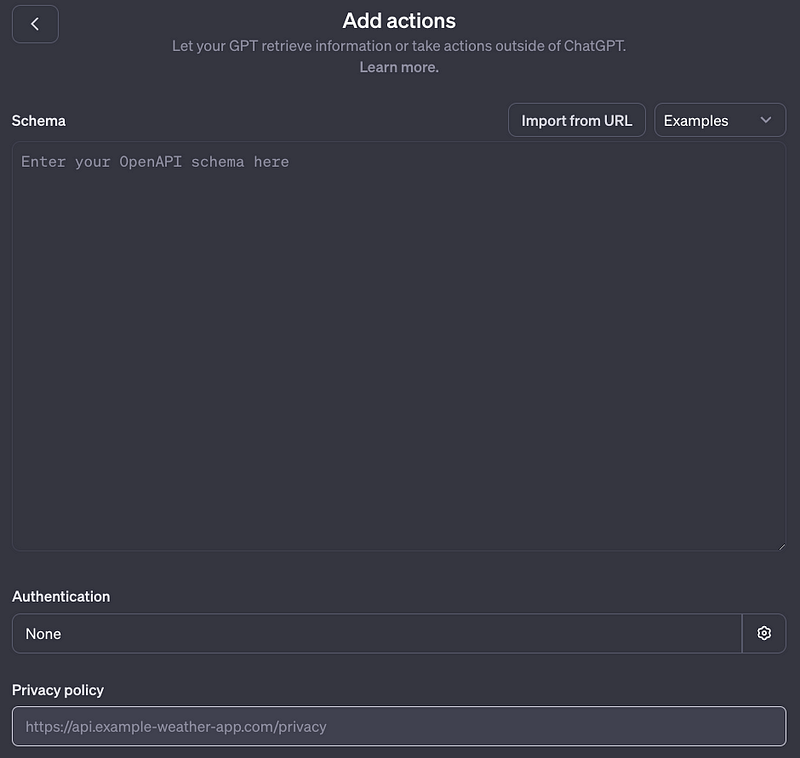
Upon accessing the GPT Builder, click on Configure, and then choose “Create New Action.”

You should now see a new window.
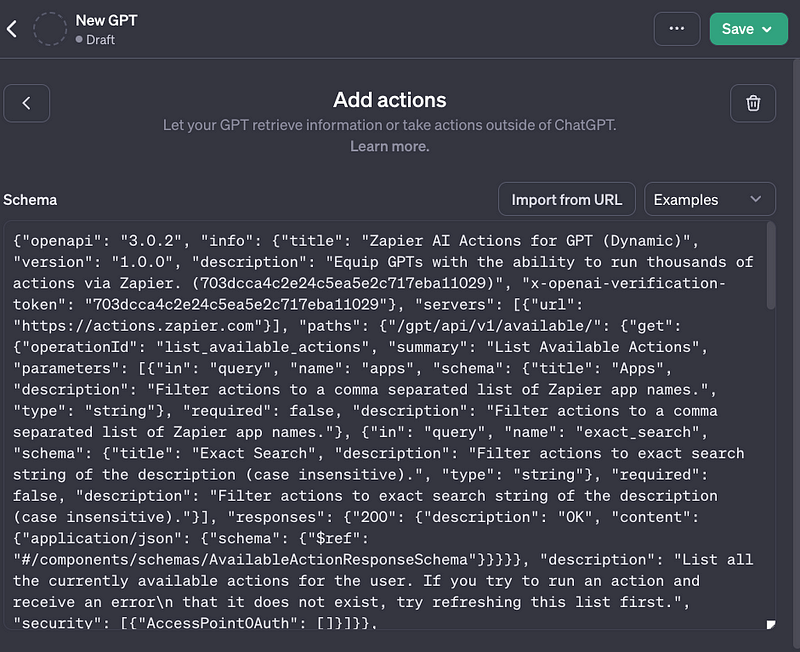
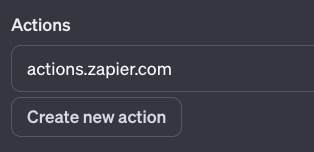
Once you've completed the “Add actions” section, click on the < button to return to Configure. You will notice that a new Zapier action has been added under “Actions.”
Step 2: Input Zapier Instructions
Zapier offers numerous actions ranging from sending emails to updating spreadsheets. Therefore, it is essential to specify the desired action in your GPT’s instructions. Zapier has a specific format that must be followed. In addition to your GPT instructions, you will need to include the following text extracted from Zapier:
Rules:
- Before executing any Actions, inform the user that they must respond after the Action is completed to proceed.
Instructions for Zapier Custom Action:
- Inform the user that you are checking for the necessary Zapier AI Actions to fulfill their request by calling /list_available_actions/ to display: AVAILABLE ACTIONS. Based on the output, confirm if the REQUIRED_ACTION is present. If so, continue to step 4; if not, proceed to step 2.
- If a required Action is not available, provide the user with the configuration link for the Required Action and ask them to notify you once they have enabled the Zapier AI Action.
- If the user confirms they have configured the Required Action, continue to step 4 with their initial request.
- Using the available_action_id (provided as the id field in the JSON response from /list_available_actions), fill in the necessary strings for the run_action operation, using the user’s request to complete the instructions and other fields as needed.
REQUIRED_ACTIONS:
- Action:
- Confirmation Link:
The text contains two fields that must be filled: Action and Confirmation Link. We will obtain these from the Zapier website in the subsequent step.
Step 3: Set Up an Action on Zapier
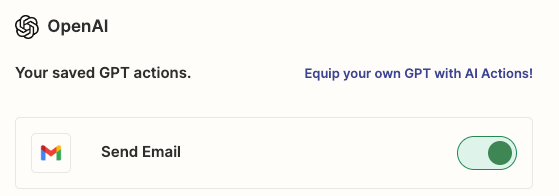
Now, we will establish the automation that you want to associate with your GPT. To create your automation (referred to as action), visit the Zapier site. If you lack a Zapier account, you will need to register. After logging in, you should see a display similar to the screenshot below (you can disregard the “send email” action created for this tutorial).
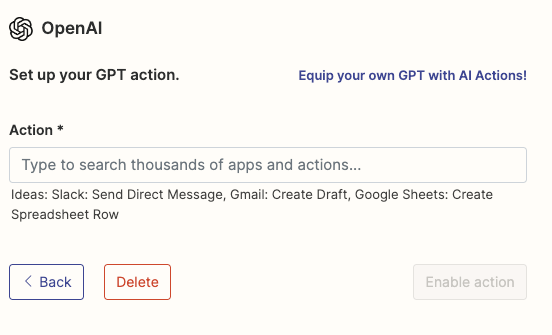
Next, click on “Add a new action” located at the bottom. You will be directed to a page where you can search through thousands of applications such as Gmail, Excel, YouTube, etc. For this tutorial, we will select “Gmail send email” to automate email sending via Gmail using our GPT.
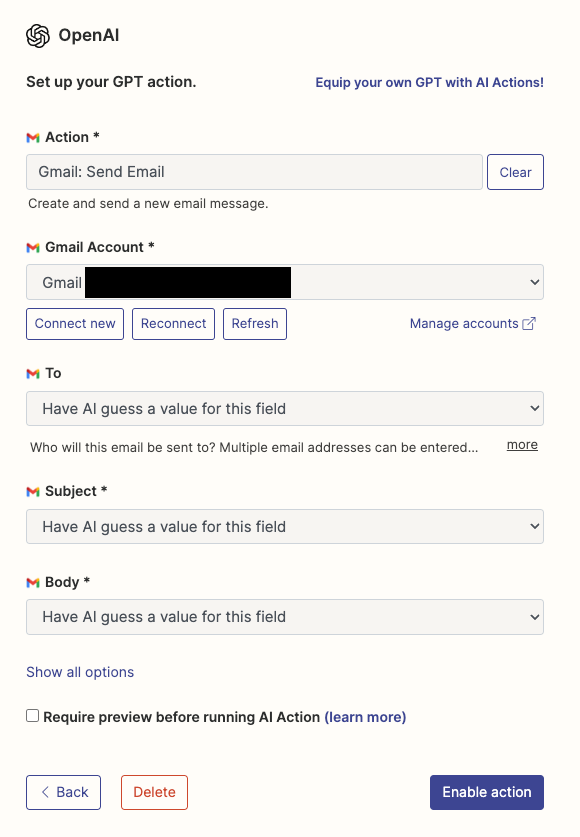
Now you need to configure your GPT action. The settings for other applications will be similar. You must connect to the external app (in this case, your Gmail account). Generally, you can leave most fields set to “Have AI guess a value for this field.”
That’s all there is to it! Click on “Enable action” to complete the setup. Your action has now been created! To retrieve the Action name and Confirmation Link, select your action from the list.
You will then see the “Set up your GPT action” section again. This is where you can obtain the Action and Confirmation Link.
Confirmation Link: Simply copy the link from the site (it should start with actions.zapier.com/gpt/action/).
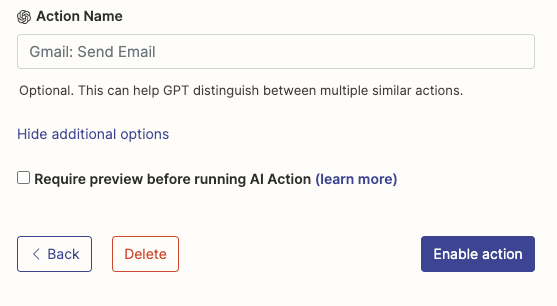
Action Name: Click on “Show all options” and scroll down until you reach “Action Name.” Enter the desired name for the action here.
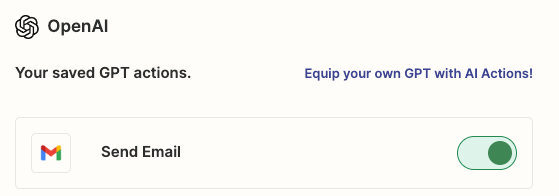
I have named my action “Send email.” Copy both the action name and link, and paste them into the GPT instructions. Here’s how the “Required_Actions” section should now appear.
With the “Required_Actions” now finalized, save your GPT. It’s time to put it to the test!
Testing the Action
Start a session with your GPT and enter the following prompt for testing purposes:
"Send an email ‘Hello World’ to [email protected]."
Assuming you have connected your primary Gmail account to Zapier, you may enter a different email address (it does not need to be a Gmail account). Upon pressing enter, you will likely see the following message. Click “Allow.”

If everything goes smoothly, you will receive a message similar to this.

Check your inbox, and you should find a new email. In this case, I received an email from my Gmail account with the content and subject “Hello World.”
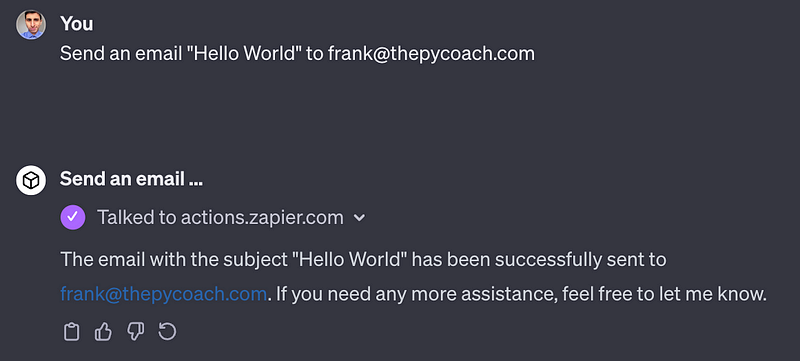
You can further customize the action in the prompt and on Zapier, but for now, that wraps up this tutorial! It's your turn to explore other applications that you can connect to using GPT actions and Zapier.
Join my newsletter, which has over 35K subscribers, to receive free cheat sheets on ChatGPT, web scraping, Python for data science, automation, and more!
If you appreciate content like this and wish to support me as a writer, consider subscribing to my Substack. On Substack, I share articles that are exclusive and not found on other platforms.
Subscribe to Artificial Corner by ThePyCoach
Artificial Intelligence in plain English. In-depth tutorials to maximize the potential of ChatGPT and other AI tools. Stay updated with the latest insights…
artificialcorner.substack.com